Thanks to all you voters out there who cast your votes, it was great to see so much interest!
So here, after much snipping and tweeking is my firts ever video tutorial. Please let me know what you think, any tips, suggestions ect.....

Showing posts with label how to. Show all posts
Showing posts with label how to. Show all posts
Monday, 24 May 2010
Thursday, 6 May 2010
:: day of diy :: paper garland tutorial
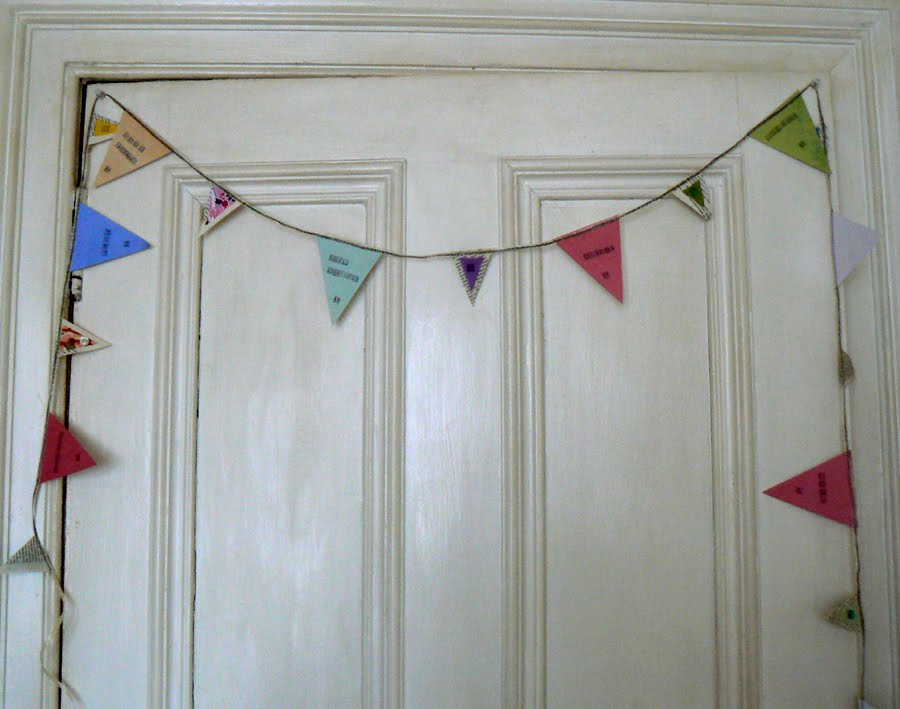 For todays ::day of diy:: I'm going to show you a little tutorial on how I made my Mum a paper garland for Mother's Day. My Mum has a cubby hole kind of room for her study that gets the sun all day. A couple of weeks ago she gutted it out, painted the walls and put in a lovely oaty coloured woven carpet. So I thought something jolly and bright for the room would be a great idea.
Materials you'll need:
::scissors
::ribbon or tafita (as long as you want your garland to be)
::different types of paper (I used 7 pieces of coloured paper A6 size for the 7 large triangles and 5 book pages for the 9 smaller triangles.) Again, you can use as many as you like depending on how long you would like your garland to be.
::buttons, sequins, little scarps of fabric. (You can use any embellishments you like, I worked with what I had handy.)
::a threaded sewing machine
::printing stamps and ink or a pen to write a message (optional)
:: PVA glue
 1. Start off by cutting out your flag shapes. I went for large and small triangles. I had some lovely soft pastel coloured paper so I decided to use them for the big ones. I decided to use recycled book pages for the small ones because it gives the garland a bit of depth and the text gives the paper some texture.
 2. Once you have all your triangles cut out, lay them out on your working surface. I then started to cut small triangle shapes from my fabric scrap bag and laying them onto the book page triangles. I decided these ones would be the ones I woule embellish, and keep the large pastel ones to stamp on.
 3. Now pva glue the fabric squares to the book page triangles, the smaller of your 2 sizes of triangle.
 4. Then start to add your little decorative bits and pieces. I put a small dollop of pva glue on this piece of fabric and added a soft pink button and a collection of purple seed beads. The glue dries and holds them in place very well.
 5. Now get out your ribbon or raffia and cut the length you are looking for. I went for 3 metres. Set your sewing machine to a zig zag stitch. This will grip the ribbon/ raffia and the paper the best.
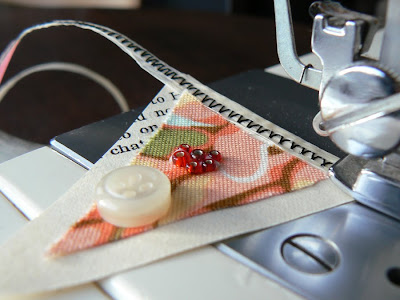 6. I started to sew just at the first triangle I wanted on my garland and then carried on right till I reached my last flag. I roughly measured the gaps in between each flag, mine were approx 10cm gaps. This is also down to you, depending on how many flags you have and how long you want your garland to be.
 7. Now to the fun bit! Lay out your stamps and get stamping. I went for little daily-do's, have faith, dance, dig in the garden, sit in the sunshine, doodle your dinner.....
You can stamp or write any thing you like. It could be a long love letter, someone's name, lyrics from a song.

 I'd love to see your versions of this so please let me know if, sorry when you get round to making yours!
xxx
Tuesday, 23 October 2007


Here we go, third time lucky I'm going to try and get these cards up, i think they were saved too big, but we'll see. Yes!!!! That's what it was, and they were saved as pdf files too! I have really enjoyed doing these, and now I just hope they sell.
I did all of the designs on Photoshop, for the purple tree card. I started with a layer which I made pink, then a layer of text 'merry christmas'. Then a new layer which smaller rectangle in white, and then put a dark purple border round it. Then a new layer in a lighter shade of purple than the text and border and used the shape tool to make the tree, decorated it with stars and text. Then I used the magnetic lasso tool and copied the tree onto a new page and saved as a separate image. Then I went back to my original design and flattened the whole thing and saved it. Next I opened Illustator and printed off the flattened image and the separate tree and cut both out and used the flattened image as a background and the single tree as a card topper.
I'm sorry if this is a bit garbled, this is my first ever computer tutorial! And I have descovered how huge digital scrapbooking is and think I have been doing it for years and making them into cards but didn't even know it!
Subscribe to:
Comments (Atom)